
If you’ve been thinking about starting your own website but feel overwhelmed by all the hosting options, you’re not alone. When I first decided to build my site simimarketingdigital.com, I spent hours comparing plans, prices, and features. My biggest worry? Getting a hosting plan that was easy to manage, fast, and powerful enough to grow with my site , without breaking the bank.
That’s when I found Hostinger. In this guide, I’ll walk you through how to create a Hostinger account step-by-step. And because I personally use the Hostinger Business Plan, I’ll also share my real results, like faster load times, smoother backups, and built-in AI tools that save me hours every month.
By the end of this article, you’ll know exactly:
- How to choose the right Hostinger plan (and why Business might be your best bet)
- How to complete your Hostinger sign up without getting stuck
- How to apply a Hostinger discount or Hostinger coupon code for maximum savings
- How to use your new account to set up a website, even if you’ve never done it before
I’ll drop my special link several times in this guide. Use it to get the best price and bonuses: Click here to sign up for Hostinger →
Use the links below to jump to the section you need
Why I Chose the Hostinger Business Plan for My Website
Before we jump into the step-by-step Hostinger account setup, here’s a quick story.
When I launched simimarketingdigital.com, I started on a basic shared plan from another hosting company. It worked — but barely. My site was slow during peak hours, backups were limited, and I had to pay extra for SSL and email hosting.
Switching to the Hostinger Business Plan changed everything:
Speed Boost: Thanks to Hostinger’s free CDN, my page load time dropped from over 3 seconds to just under 1 second for visitors worldwide.
More Space: 50 GB of SSD storage meant I didn’t have to worry about running out of room for images, backups, and plugins.
Daily Backups: No more panicking about losing my work — I can restore everything in one click.
AI Website Tools: The Hostinger AI tools helped me generate product descriptions and optimize my WordPress posts faster.
Better Uptime: My uptime improved to 99.99%, which is crucial for keeping Google happy.
That’s why I recommend the Business Plan for anyone serious about their website from day one.
Step 1: Go to Hostinger’s Website
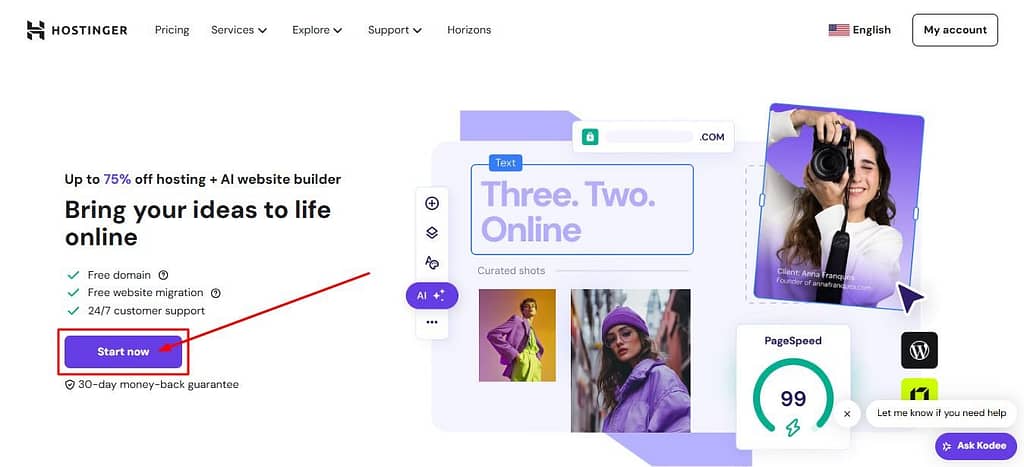
The first step in how to create a Hostinger account is to head over to Hostinger’s homepage.
Once you’re there, click on “Get Started” or scroll down to see the Hostinger plans.
The plan you choose will directly affect your site’s performance, security, and ability to grow. Picking the right one now means you won’t have to upgrade too soon.
Step 2: Choose the Right Hostinger Plan
You’ll see several Hostinger plans:
Single Web Hosting – Best for tiny sites or portfolios (low cost, but limited).
Premium Web Hosting – Good for small blogs or personal projects.
Business Web Hosting – My pick — best for growing websites and small businesses.
Cloud Hosting – For very high-traffic or resource-heavy sites.
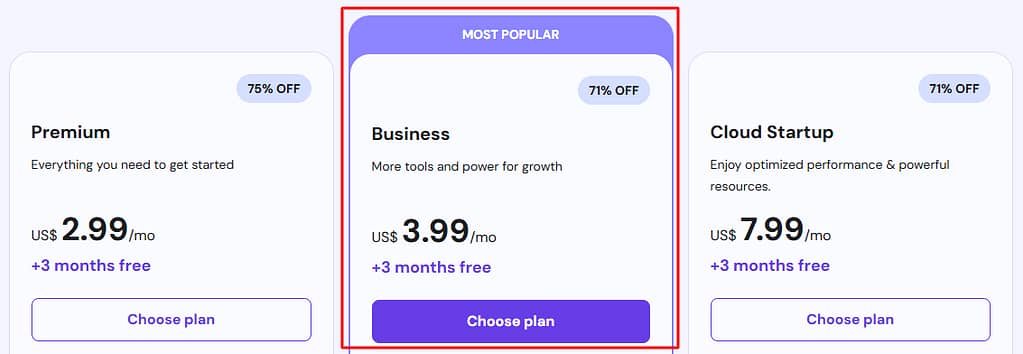
Why I picked Business: It’s a sweet spot between price and power. You get 4x more resources, daily backups, 50 GB SSD storage, and 50 websites on one account. This means I can run multiple projects without extra hosting fees.
Hostinger often offers a Hostinger cheapest plan discount, but the Business Plan can sometimes be almost the same price if you use a Hostinger promo code.
Step 3: Select Your Hosting Period
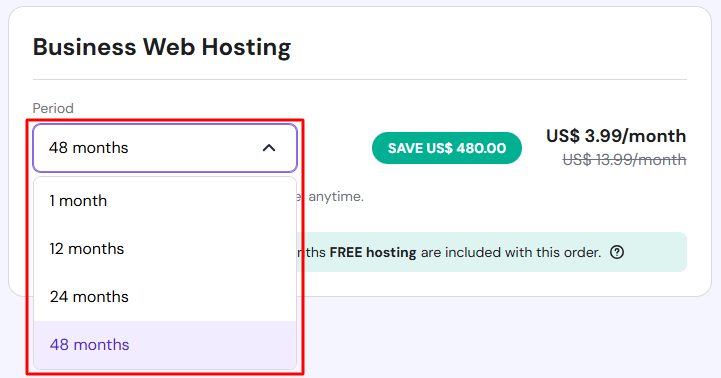
After clicking on the Business Plan, you’ll choose your billing cycle:
1 month (highest monthly cost)
12 months
24 months
48 months (lowest monthly cost + biggest savings)
Why this matters: The longer your term, the bigger your Hostinger discount. For example, a 48-month plan locks in today’s low rate for four years.
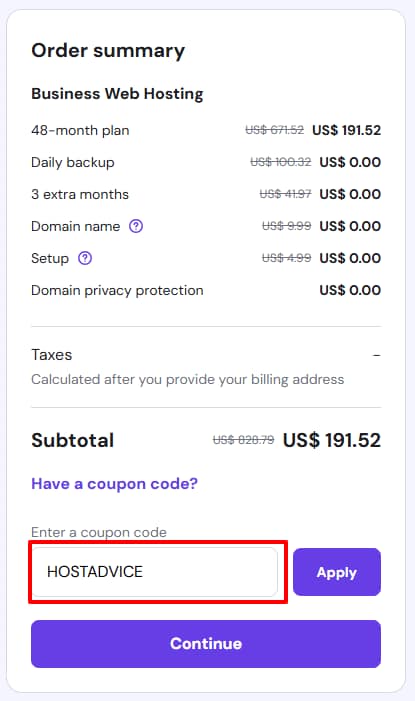
Step 4: Review Your Order and Apply a Coupon Code
After you choose your Hostinger plan and billing period, you’ll be taken to the Order Summary page. This is where you can see the total price before creating your account and where you can apply a discount.
You’ll notice a field that says “Have a coupon code?”.
This is your chance to save big.
For the largest discount I’ve tested, type in HOSTADVICE and click Apply.
You’ll see the price drop instantly. For example, the 48-month Business Plan went from $191.52 to $172.37 in my test, that’s an extra $19.15 off on top of the already huge discount. and that includes 3 extra months free, a free domain name, daily backups, and domain privacy.
Important: Make sure you click my affiliate link first → Get Hostinger Discount before applying the coupon, so your purchase still supports this site without costing you extra.
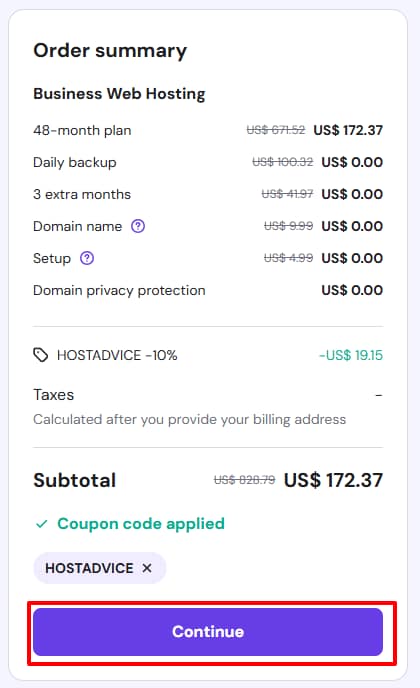
Once you’re happy with the total, click Continue to move to account creation.
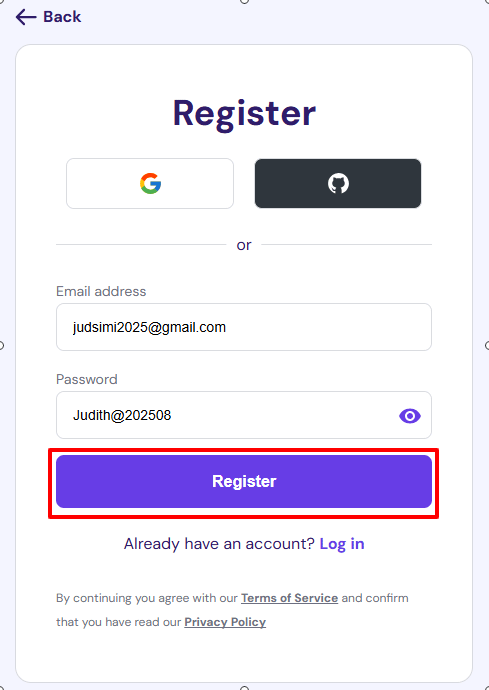
Step 5: Create Your Hostinger Account
Here’s where the Hostinger registration actually begins.
You can sign up using:
Email + password (most common)
Google account
Facebook account
Why this matters: Your login is the key to your Hostinger dashboard, where you’ll manage everything , domains, websites, backups, and more.
Use a strong password and keep it somewhere safe. Your hosting account is as valuable as your bank login ,treat it with the same security.
Step 6: Fill In Your Personal and Billing Information

Before you can pay, Hostinger needs your billing details.
You’ll see fields for:
First Name & Last Name
Country of Residence
Phone Number
Address (use the format: 1234 Main Avenue)
City
State/Province
ZIP/Postal Code
This information ensures your payment is processed correctly and matches your payment method. It also helps Hostinger provide the right currency and tax information for your location.
Once you’ve filled in everything accurately, click Continue.
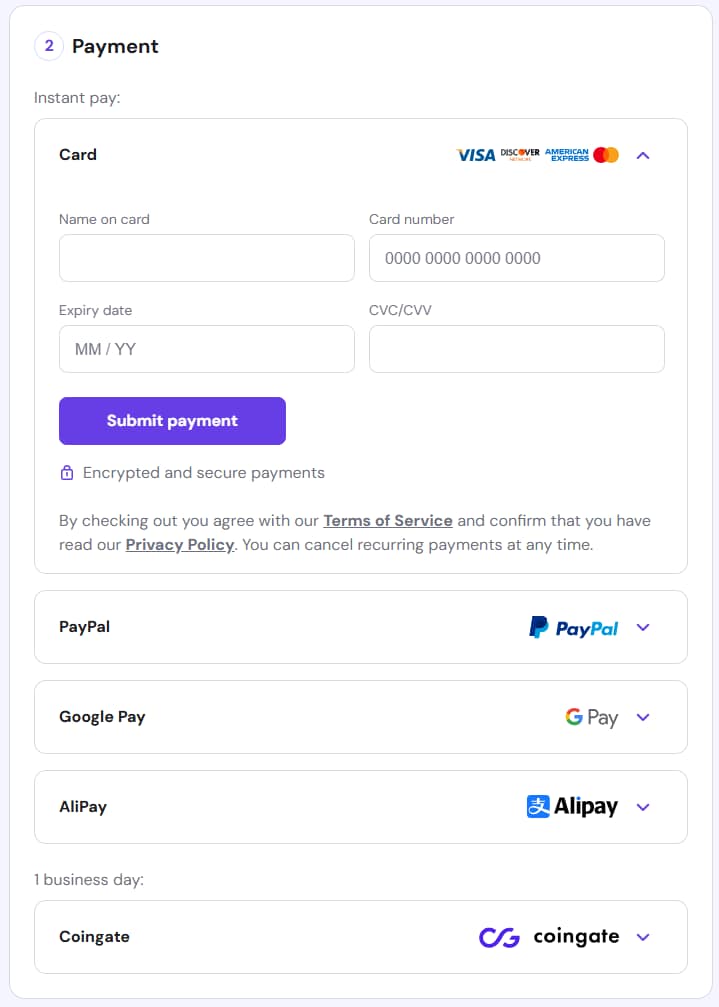
Step 7: Complete Your Payment
Now it’s time to secure your hosting plan.
Hostinger offers several payment options:
- Credit/debit card
- PayPal
- Google Pay
- Cryptocurrency
- Other methods depending on your country
Knowing how to pay Hostinger is important, especially if you’re outside the US. They support multiple currencies and gateways, so most customers can pay without issue. Personally, I always choose to pay by PayPal, it’s fast, secure, and I don’t have to type in my card details each time.
After your payment is processed, you’ll be redirected to your new Hostinger dashboard where you can start setting up your site.
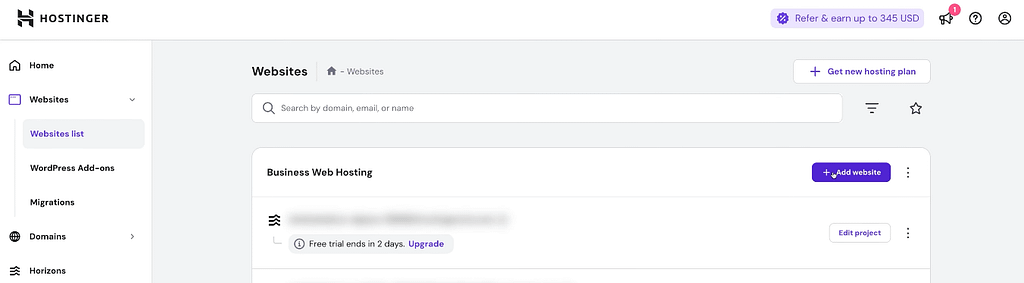
Step 8: Set Up Your Website in Hostinger (WordPress + AI Options)
Once your payment is complete and you log into Hostinger’s hPanel, setting up WordPress is super simple.
- Go to Websites → click Add Website → choose WordPress.
- Hostinger’s panel is beginner-friendly and packed with smart features like an AI WordPress troubleshooter and auto-updates.
- You’ll go through a quick onboarding. You’ll need to create credentials, but here’s the cool part: Hostinger already fills in this info and even generates a strong password for you.
- You literally don’t need to type anything, but I strongly recommend saving those login details in a password manager, just in case you ever need them outside the Hostinger dashboard.
Now comes the fun part, building your actual website.
Hostinger gives you three main methods:
Option 1 – Hostinger AI WordPress Website Builder (Business & Cloud Plans)
Describe your site, and Hostinger’s AI will generate a complete WordPress site in seconds.
You can then tweak everything using normal WordPress tools.
Perfect if you want something ready to launch fast with only a few edits.
Option 2 – Pre-Built WordPress Themes
If you love classic templates, you can browse and select a theme you like.
Once installed, you’ll land directly in your WP Admin ready to customize.
Great for people who want structure but still want to play with design and plugins.
Option 3 – Blank WordPress Installation
This installs the default WordPress setup with its basic theme.
Best if you want full creative control and plan to choose all plugins and themes yourself.
Which one should you choose?
- If you want a ready-to-launch site with minimal setup, go with AI WordPress Website Builder.
- If you want to experiment with designs and layouts quickly, pick Pre-Built Themes.
- If you’re a hands-on creator who wants control over every detail, choose a Blank Install.
Step 9: Connect Your Domain and Choose Data Center
After you’re done with plugins (I recommend you install RankMath and Google Insight) and the WordPress quick setup, the next step is to connect your domain name.
- If you purchased your Hostinger subscription through my link, you should already have a free domain name included. Use it here.
- If you don’t have a spare domain yet, or just don’t want to connect it now, you can use a temporary subdomain that Hostinger provides. Later, you can easily switch to your real domain.
💡 Data Center Selection:
Hostinger will also ask you to pick your data center location during the first setup. This isn’t something a lot of beginners think about, but it matters:
- Hostinger automatically suggests the best data center based on where most of your visitors are likely to come from.
- Don’t stress too much, though — Hostinger is fast worldwide, and you can change your data center once per month for free.
- For example, if your audience shifts from the US to Europe, you can adjust it in one click.
This flexibility is one of those little details that makes Hostinger more beginner-friendly compared to other hosts.
Step 10: Explore Your Hostinger Dashboard
Once your domain is connected and your data center is set, you’ll land in the Hostinger dashboard (hPanel).
This is where you’ll manage everything about your hosting and websites. Compared to the old-school cPanel, hPanel is much cleaner and easier for beginners.
Here are the key areas to check out right away:
- Website Management – See all your installed websites, domains, and quick actions like adding a new site or migrating one.
- WordPress Management – Access the auto-update settings, AI WordPress troubleshooter, and staging tools.
- File Manager – If you ever need to upload or edit files directly, this works like a built-in FTP client.
- Email Accounts – Set up professional email addresses (e.g., info@yourdomain.com).
- Backups – View and restore daily backups. (This is especially powerful on the Business Plan.)
- AI Tools – Explore the AI Writer, AI Logo Maker, and AI Blog Assistant for content and branding.
- Security Settings – Enable SSL, 2FA, and malware scanning.
My Experience:
I love how Hostinger puts all these essentials in one simple dashboard. It saves me from having to juggle different tools or third-party services. As someone who started on messy cPanel setups, hPanel feels like a breath of fresh air.
Step 11: Secure Your Dashboard and Enable Backups
Now that your site is live, the most important thing is making sure it’s safe and recoverable if something goes wrong. Here’s exactly how to do it inside Hostinger:
Enable Daily Backups
- Log in to hPanel.
- In the left sidebar, click on Websites → select your website.
- Scroll down to the Files section and click Backups.
- Here you’ll see if your daily backups are active (Business Plan enables them automatically).
- To test it, click Generate new backup and wait a few minutes. You’ll now have a restore point you can use anytime.
If a plugin breaks your site later, just go back to Backups → Restore and pick a backup date to roll your site back in one click.
Want to see how it’s done? Check out my full guide here: How to Restore Backups in Hostinger (Step-by-Step)
Turn On Two-Factor Authentication (2FA)
- From your hPanel dashboard, click your Profile Picture in the top right corner.
- Choose Account → Security.
- Click Enable 2FA.
- Download an authenticator app (like Google Authenticator or Authy).
- Scan the QR code Hostinger shows you and confirm by entering the 6-digit code from your phone.
Now, even if someone guesses your password, they can’t log in without your phone.
Activate Free SSL Certificate
- Go back to Websites → choose your domain.
- Under the Security section, click SSL.
- Select your domain and click Install SSL.
- Wait a few minutes — Hostinger will automatically connect Let’s Encrypt SSL to your site.
Once active, your site will load with https:// instead of http, which secures visitor data and gives you a small SEO boost.
My Experience
When I first launched my site, a theme update broke my homepage layout. Thanks to Hostinger’s daily backups, I restored the site in less than 5 minutes — no coding, no support ticket needed. Having 2FA + SSL already on my account gave me confidence that my site and visitors were safe.
That’s how you properly finish the setup process: not just creating your account, but making sure it’s secure from day one.
🚀 Ready to Launch Your Website?
Get Hostinger Business Plan today with up to 85% OFF + Free Domain & SSL.
⭐ Start Now with Hostinger Secure checkout. Pay by Card, PayPal, or Google Pay.


[…] See how to Sign Up to hostinger step-by-step […]
[…] of the Fastest Web Hosting 2025. When you’re ready to launch, here’s a step-by-step guide on how to create a Hostinger account in just minutes. And if you ever need to roll back a change, you can always restore backups in […]